Motor Project # 2 - Spaghetti Anyone
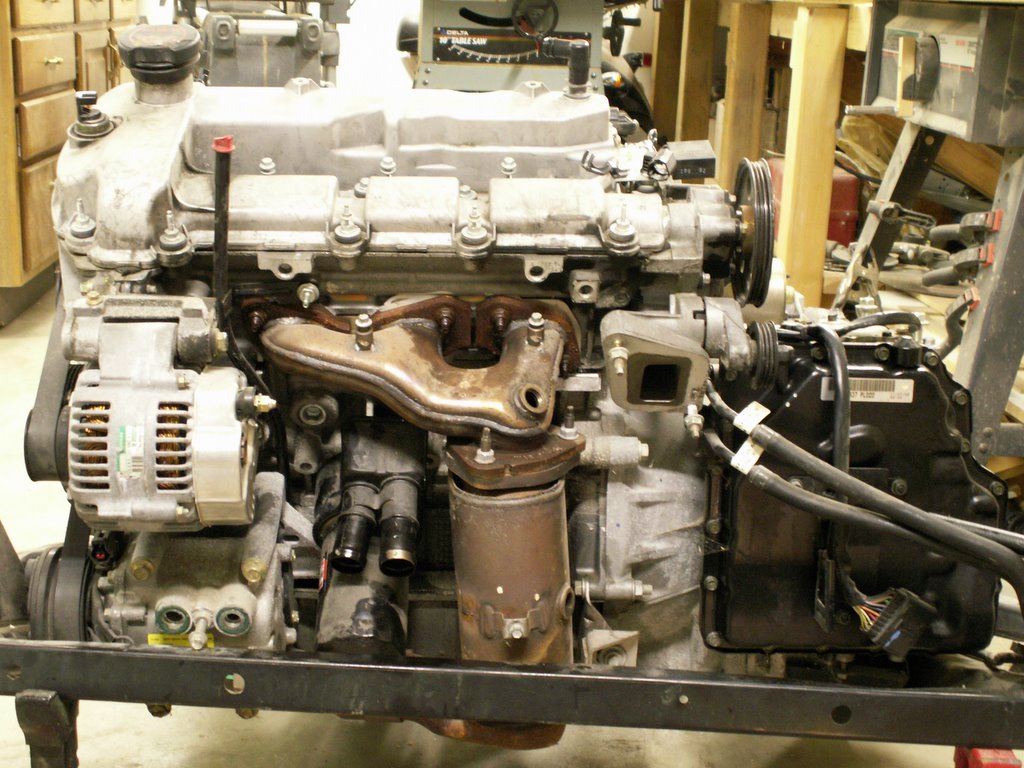 oject is moving very rapidly right now becasue I need to get the auto transmission separated so I can sell it. After I get the engine on the stand things will slow down a lot. Since the "arrival" pics, I've stripped off all of the accessory plumbing, electrical and intake manifold. X-Type owners, want to see what your motor looks like naked? This is the front bank. Jag refers to left/right banks, but that is confusing so I'll always use the front (closest to you when standing in front of the car with the hood open).
 Here is the back bank. The one that lives in the dark and few ever get to see.
And a picture of the top of the engine with the intake manifold re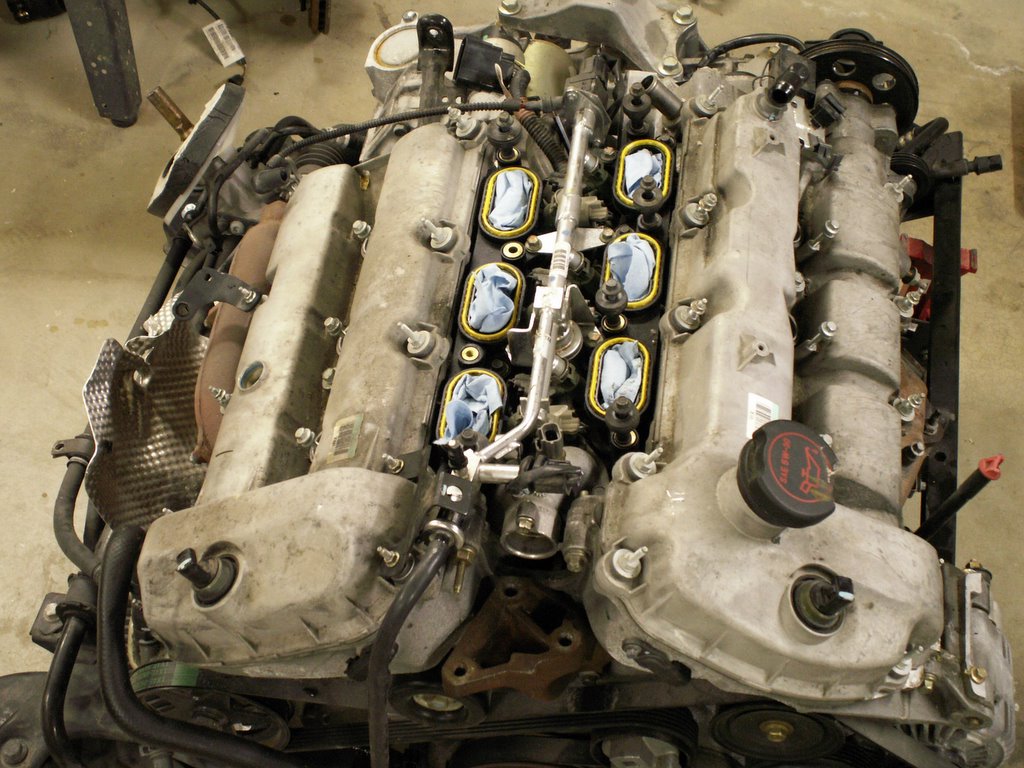 moved and all of the electrical harness and coolant plumbing. The lower intake manifold is still in place. It includes the fuel injectors and fuel rails. The yellow ovals are the O-ring gaskets that seal the upper intake to the lower.
Spaghetti Anyone?? Ever wonder what the wiring in your X-Type looks like with all of the other hardware missing? Well, here it is, laid out just about the way it sits on the engine. This  one harness covers the entire engine management system. I've placed the spark plug coils where they plug in so that you can get oriented. The coil set on the right goes to the back bank, and the computer or engine control module (ECM) is plugged in too - the silver box. Every plug in the picture, with the exception of a few for the alternator and starter, go to a sensor that inputs to the ECM.
Interestingly, I found two end points that had unusual fastening. Either Jag found weaknesses in testing or wanted to ensure connection anticipating weaknesses. One terminal is the low voltage side of the starter solenoid, the othere is a ground lug found mounted to the outer left hand corner of the outer bank cylinder head. These two lugs were glued in place before the mechanical connection was made. Not quite sure what the glue was. It looked like hotmelt, but I don't believe that would stand up to the heat. Might be epoxy.
I once worked for a brilliant MIT engineer, Ken Olson. He created Digital Equipment Corp (DEC). He used to tell his engineering managers 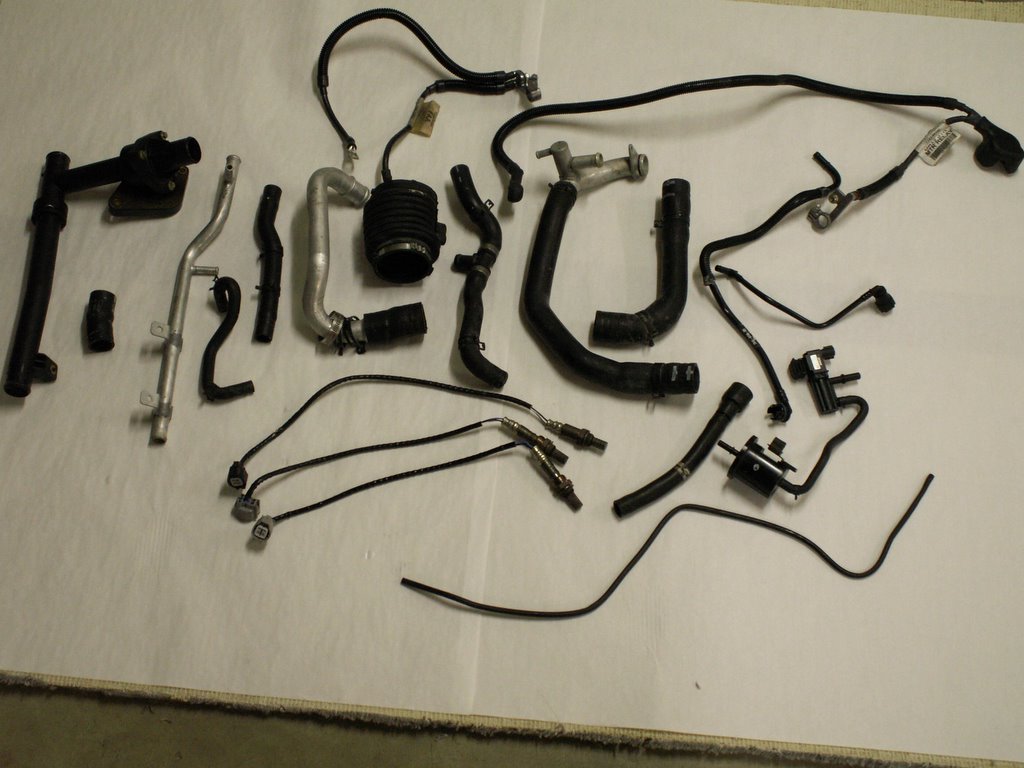 NOT to design products like they were "high school shop" projects. I've worked on Jags since my first XJ6 Series III and Ken Olson would have some criticism of Jag's coolant system. Here is a picture of about 3/4 of the plumbing! At least two coolant hoses are missing because they were cut off during salvage. I've included a few electricals that were missing from the harness photo. Jag has a bad habit of designing the cooling system with a myriad of hoses and connectors. Many of these are not even visible until other components are removed. Then, all of these hoses are form fitted, meaning they are exclusive to this model. That means they are awfully expensive as volume never gets high enough to really mass produce. And, many of us will have the unfortunate experience some day to have one of these hoses fail on the road as we tend to avoid the PM, but that's when it really gets expensive! I'm showing three of the four Oxygen sensors on the very bottom. One fell victum to the salvage process.
I know that some like doing their own simple tune ups - spark plugs, air cleaner, etc. On the X-Type, that means removing the intake manifold to get to the plugs in the back bank. If there is enough interest, I'll write a simple "practical" process for changing spark plugs now that I know where the "hidden mounting hardware" is on the intake manifold. Here is a picture of the "dark side" of the intake manifold, where four hidden screws reside. If there is interest, I'll post it as a separate project # with pics of the intake manifold from all angles.
Finally, a bonus picture - one of the strut and axle half assemblies: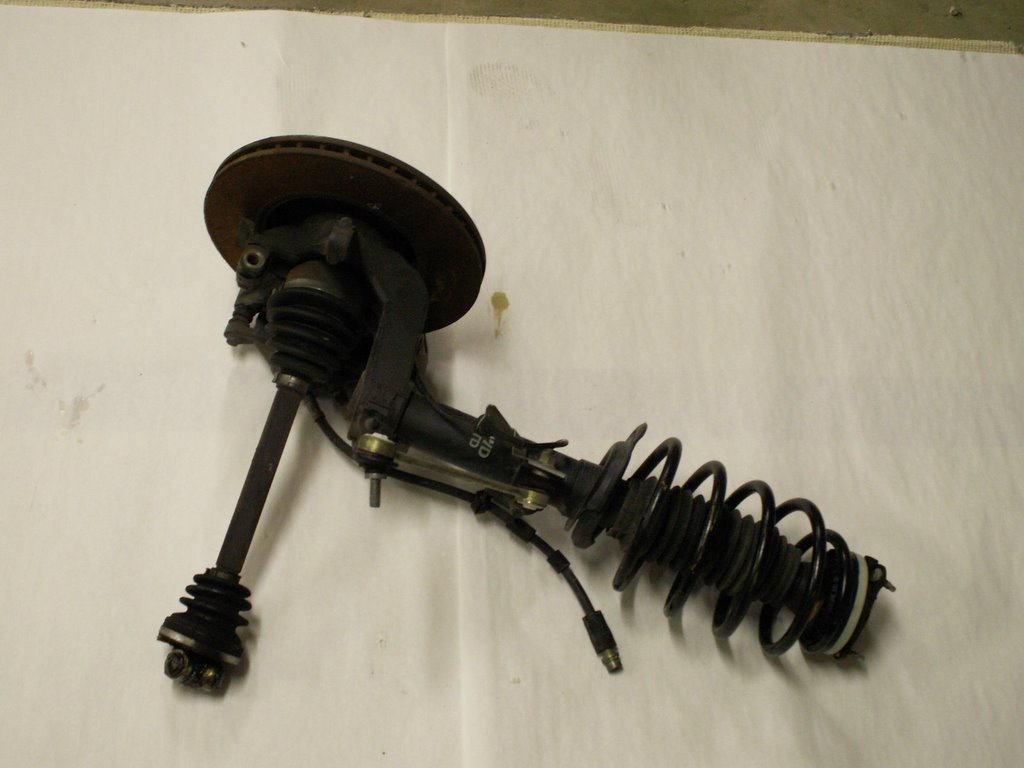
By the time I post again you'll see the engine on the stand with the auto trans (long) gone.
posted by skhannes at 5:44 PM
![]()
![]()

5 Comments:
Glad to see that you were able to get up and running with Blogger. Keep the pictures coming!
Let me be the first to chime in and express that interest! ..Yes, absolutely if you have the time to post up the do-it-yourself-ers instructions to all 6 plug changes (etc.) I would love to see it. Thank you, for sharing this project with us all as it is now!! :-)
-Grant
Very interesting - I'll be following along. My only engine mod to our 3.0 is a K&N! :)
Thanks for your interest all. I'll be posting lots of projects for the motor in the ensuing weeks.
First will be this weekend with a challenge to create a set of headers for this motor. Watch for it by Sunday/Monday 12/18.
Steve. Just getting to reading through all your posts to date in detail.
Great project and I bet lots of fun.
I'd also like to see the spark plug walk-through. I'm thinking about tackling it myself, rather than pay big $$$ to the dealer.
Post a Comment
<< Home